Split Diamond Viking Navy sail design
comments... add size to all pictures
When making a cross section, show other views also.
Split Diamond Viking Navy sail design
On the rune stones the sail was small
So I figured the square sail was folded in half in honor of somebody, like we fly a flag at half mast today.
On the rune stones the mast was short
So I figured the square sail was doubled on both sides like an A-frame house. The A-frame idea also does away with the problem that the Vikings used no standing rigging.
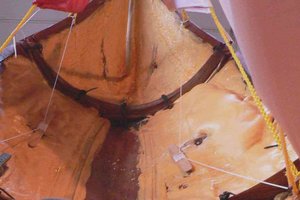
So it looks like this.

The Vikings did not have the pully

Thus I am using glass beads for a slipping pully.
And kite sized sails so that no pully is needed.
How to build the Viking Navy split diamond sail
split diamond detail
top sheet detail
down haul detail

up haul detail

leading edge detail

The leading edge is 1 layer of sailcloth and will be sewn around the rope.
To mount a sail, the leading edge is first pinned into the correct position.
1. Is when the bead in the junction and the bead in the batten line up.
2. Then the up haul thread is used to stitch the leading edge to the rope and the down haul thread is used to stitch the leading edge to the rope.
batten detail
Note that the bottom is a little longer than a perfect split diamond. This is to allow a bit of overlap.
The sewn batten pocket is just big enough to take a small piece of fishing pole. Small side to the front. This will allow the wind to make a little sholder out of the sail.
Split diamond sewing patern and heming instructions
1. D(Batten tail) Stitch a 3 inch hem and sew around the box using a 1 inch hem.
2. F(Batten head)Stitch a 1 inch hem.
3.
Put the two sides together with the hems showing and sew them up using a 1 inch hem. Leave A, F and D open.
4. Turn the sail inside out.
Step 2.
Back of leading edge inner pocket of split diamond sail
Cut a piece of fabric 6 inches wide and longer than you need.
Sew
1. make a 90 degree point on one end using a scrap piece of fabric
2. make a hem on the other end
3. the length needs to be the distance along the rope side.
4. cut a piece of kite string three times this long plus another foot
( this next step requires a cord sewing foot on your machine)
5. sew this string into the sub assemble three times leaving a one inch loop at each end
6. You should now have a 6 inch end of kite string sticking out of each end of the sub assembly
7. You are done. now trial fit it into place with the split diamond.
Fit to the sail
1. Use two cloth pins to attach the sail where you want it
2. Pin the above 6 inch fabric inside the sail on the inside of the rope
3. Remove from rigging and using a yard stick and a dowel the size of your rope, pin the sail to the 6 inch fabric.
4. Sew what you just pinned, be sure to leave room for the rope. And stop short of the end so the batten has a bit of room.
5. Fold over what is left and sew it also. Again leave some room for the tip of the batten.
To mount a split diamond sail
0. Insert the sheet into the batten and secure it.
1. Wrap the leading edge around the front rope making a pocket in the pocket and pin it in place.
2. Insert the batten and pin it in place.
3. Stitch in the up haul a half inch from the back side of the foldered over leading edge.
4. Stitch in the down haul a half inch from the back side of the foldered over leading edge.
5. Stitch in the batten.
6. Thread the sheet thru the leading edge pockets of the sails below and back.
7. Attach to the correct stearing stick on deck.
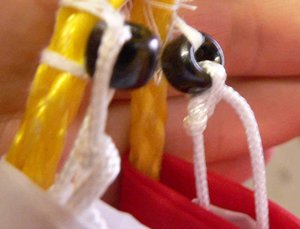
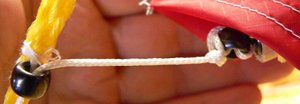
Split Diamond Junction detail using a doublebead
Batten end detail
Split diamond reefed
The reefing line is stored at the point of the split diamond while under sail. Pulled down into the pocket of the sail ahead and below the sail it reefs.
Both reefing lines also go inside the pocket of the sail above and back from the one being reefed.
While under sail,these reefing line are on the outside of the sail they reef, thus make the color of the reefing lines match the color of the leading edge of the sail they reef.
Sailing note: Due to the interference of the sheet of the reefed sail with the sail above and back from the reefed sail, reefing is most often started from the top down so that this interference does not mater.
How to build and sail the Viking Navy sailing kayak
Viking Navy sailing kayak
I had always thought if I found the right idea for the big ships sails, they would work on kayaks.
When I built the kayak model and tested it here is what I got.
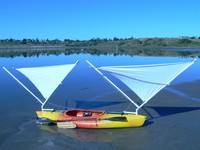
pete-has-a-kayak-with-two-viking-split-diamond-sails
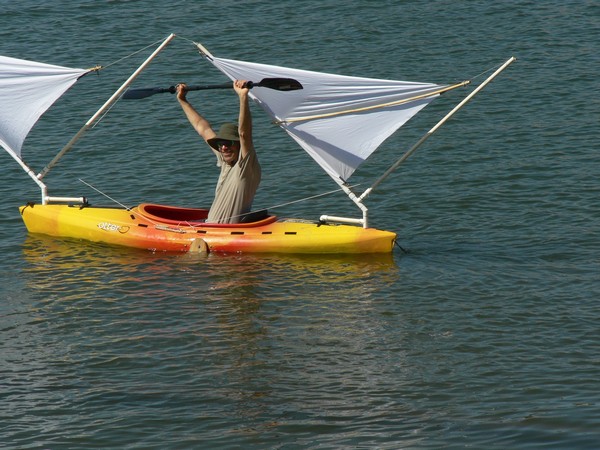
pete-is-happy-with-his-kayak-with-two-viking-sails-and-a-little-wind-04-13-2008
kayak steering device detail
For normal sailing, the slack line is wound around C and attached to A with both Bs.
How to sail a Viking Navy kayak
1. To steer into the wind, the whole steering device is moved forward.
2. To steer away from the wind, the whole steering device is moved backward.
3. For full luff, all the slack is let out. (Take both Bs off C and let C spin off the sheets.)
4. For full tight sails, the whole steering device is moved over the head of the kayaker.
(This move is used for skipping down waves and you need to get into it and out of it very fast).
A full sail of split diamonds
Pete's little boat nutshell full sail
Pete's little boat nutshell full sail top view
A full sail of split diamonds
Oar angle.
I did not set the oars straight out... I tried that one time and kept getting sea weed stuck on the oars, so I set the oars to all the way back so sea weed would slid right off.
Sail control.
You need to dream up a way to allow the front half of the sails to go slack or go right straight ahead tight. The same with your back half. Here is why. To turn a sail boat without a rudder, you slack the sails in front of the mast and at the same time tighten the sails in back of the mast. That causes the boat to weather vain right into the wind. Then once the boat has passed thru the head of the wind to the other side, you slack the back sails and tighten the front sails to let the wind complete your turn.
Now while you are dreaming up how to do this, add two more controls: 1. all sails slack, nice when it looks like the boat is in trouble. 2. all sails tight, used when you are skipping down a swell. Also looks good and keeps the rain out at anchor.
Steering sticks

These steering sticks are the same as the ones used on a full size Viking ship rigged with split diamond sails.
These steering sticks are the major tools for trimming the sails and turning the boat.
Nutshell with steering sticks
There is one steering stick for each two split diamond sails.
For the steering sticks to work properly, one of the split diamond sails attached to each steering stick must be located in the front half of the boat and the other split diamond sail attached to the same steering stick must be located in the back half of the boat.
Nutshell with split diamond

On my little boat Nutshell, the two white split diamond sails share one steering stick and the two red split diamond sails share the other steering stick.
Nutshell 2 uphauls
Main sheet detail
The end of the batten has a bead attached so there is an easy place to attach the main sheet.
Then the main sheet passes thru another bead attached to the diamond rigging.
Then this same main sheet passes thru another bead attached to the boat.
Then this same main sheet goes to one end of it's steering stick.